Create a GitHub Profile README.md with widgets

I am a Front end developer currently working on React JS, HTML, CSS, Python, Vue JS, Webpack, Babel, AEM etc.
Ever since GitHub released the feature that allows users to add a profile level Readme to showcase their interests, bio, contributions etc., I have been wanting to add one to my GitHub profile . While I did that, I thought why not document this and what better way than a blog post.
What am I going to do ?
- Create a new repository using the github web interface with a readme file.
- Add content into that readme file using markdown.
- Add some widgets to power the github profile . Eg GitHub stats, GitHub streak, stackoverflow reputation , top languages etc.
Create a Readme github profile
Step 1: Go to https://github.com/ and on the top far right corner, click the + icon and click on New Repository.
Step 2: Enter the repository name. It should be same as your github username. In my case , my github username is kritika-pattalam so I entered that.
Step 3: Make sure you select the option public .(P.S Github profile will be available for others to view only if the repository is public.)
Step 4: Select Initialize this repository with a README.
Step 5: Click Create Repository
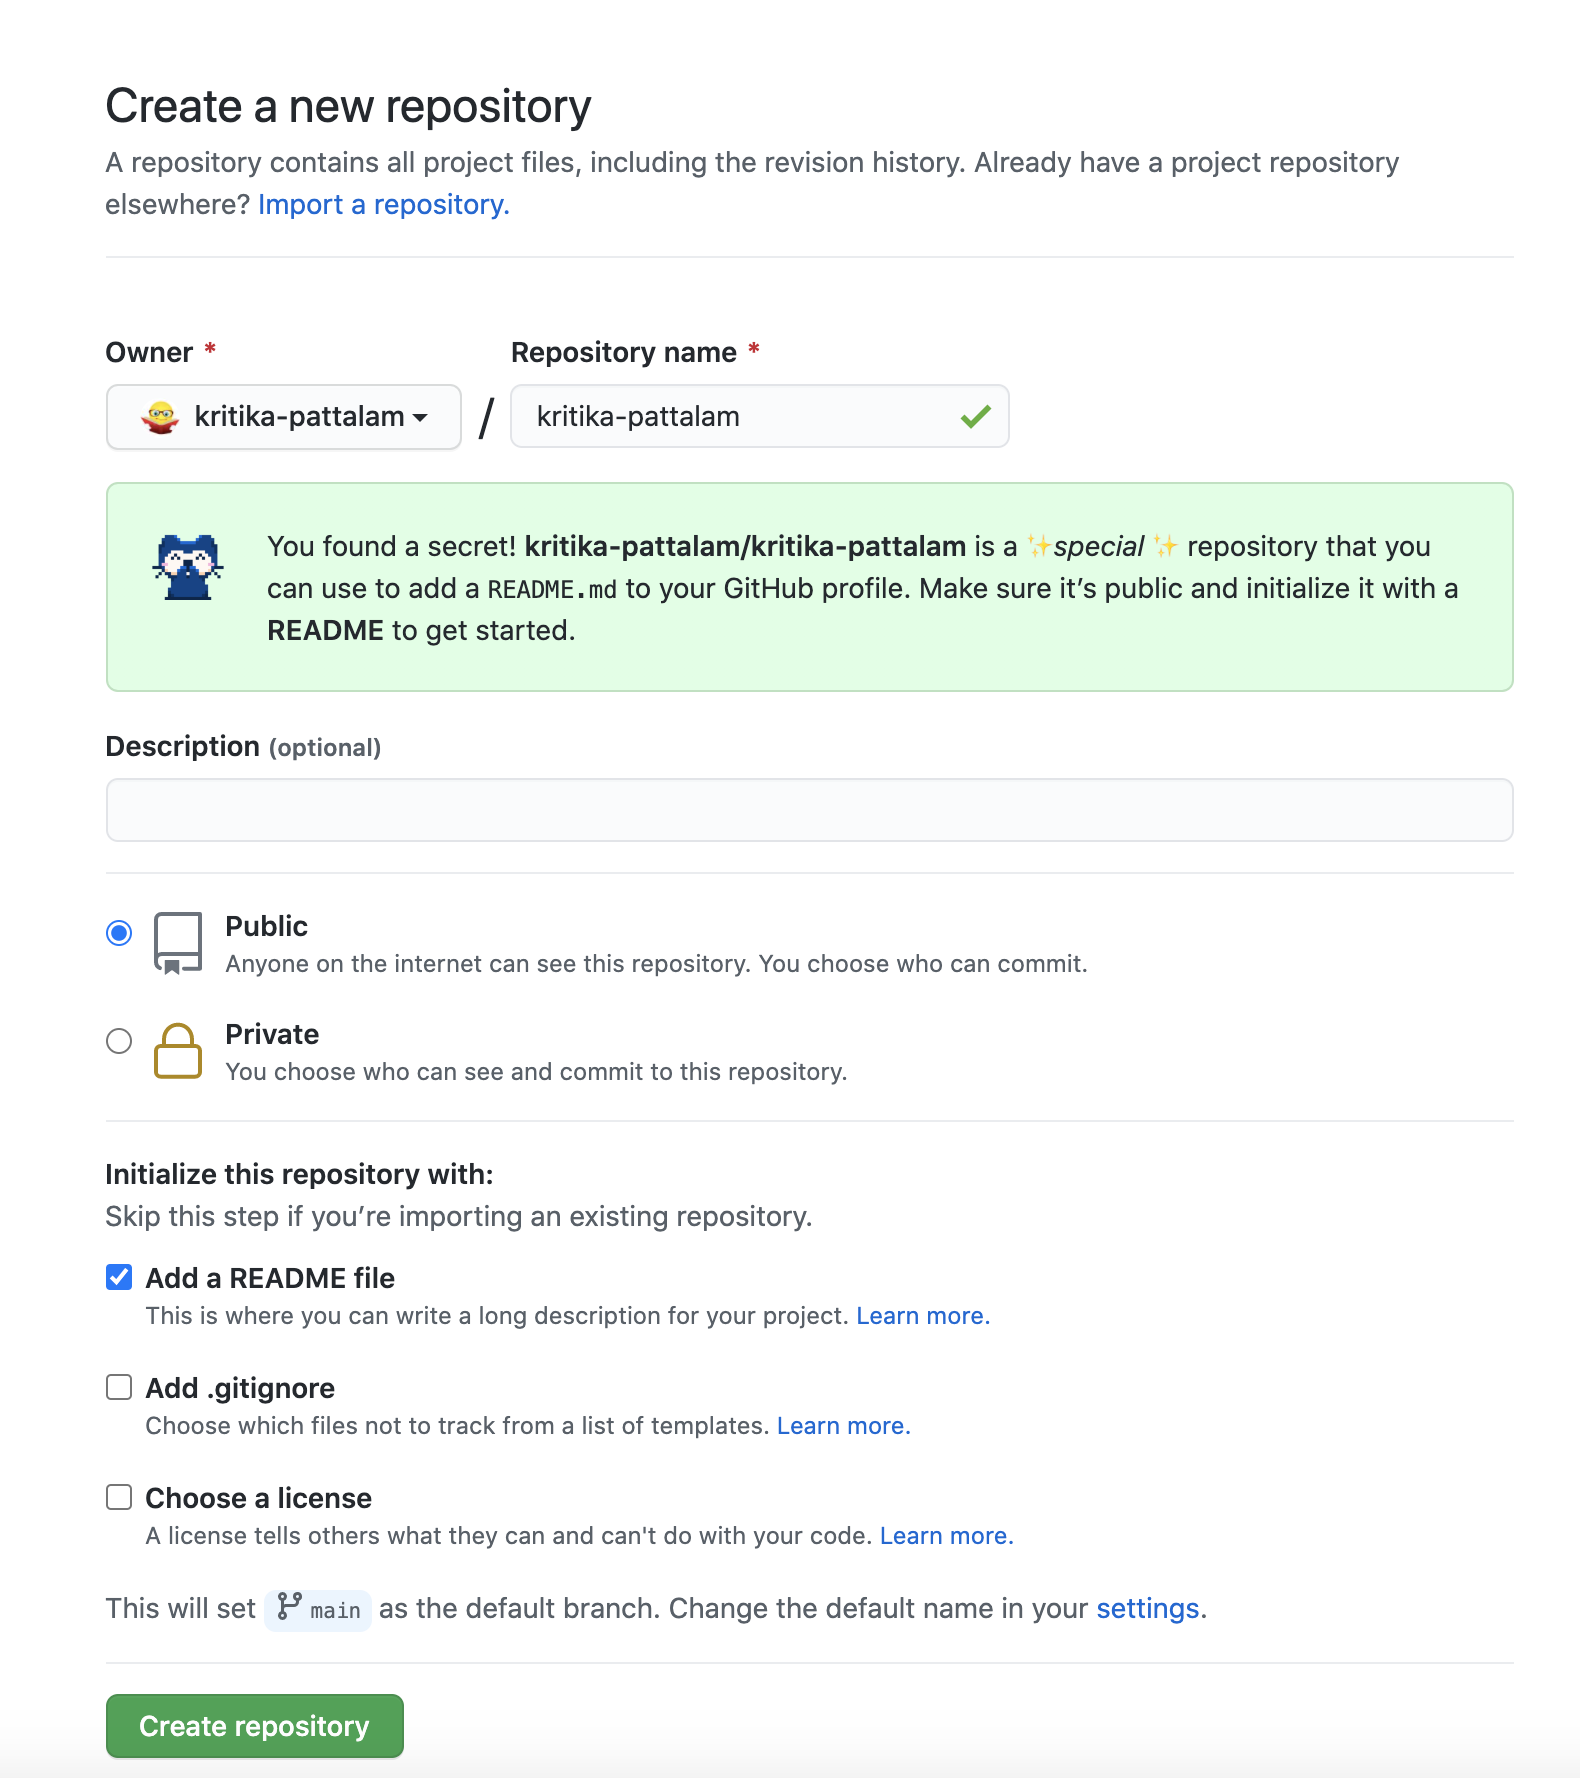
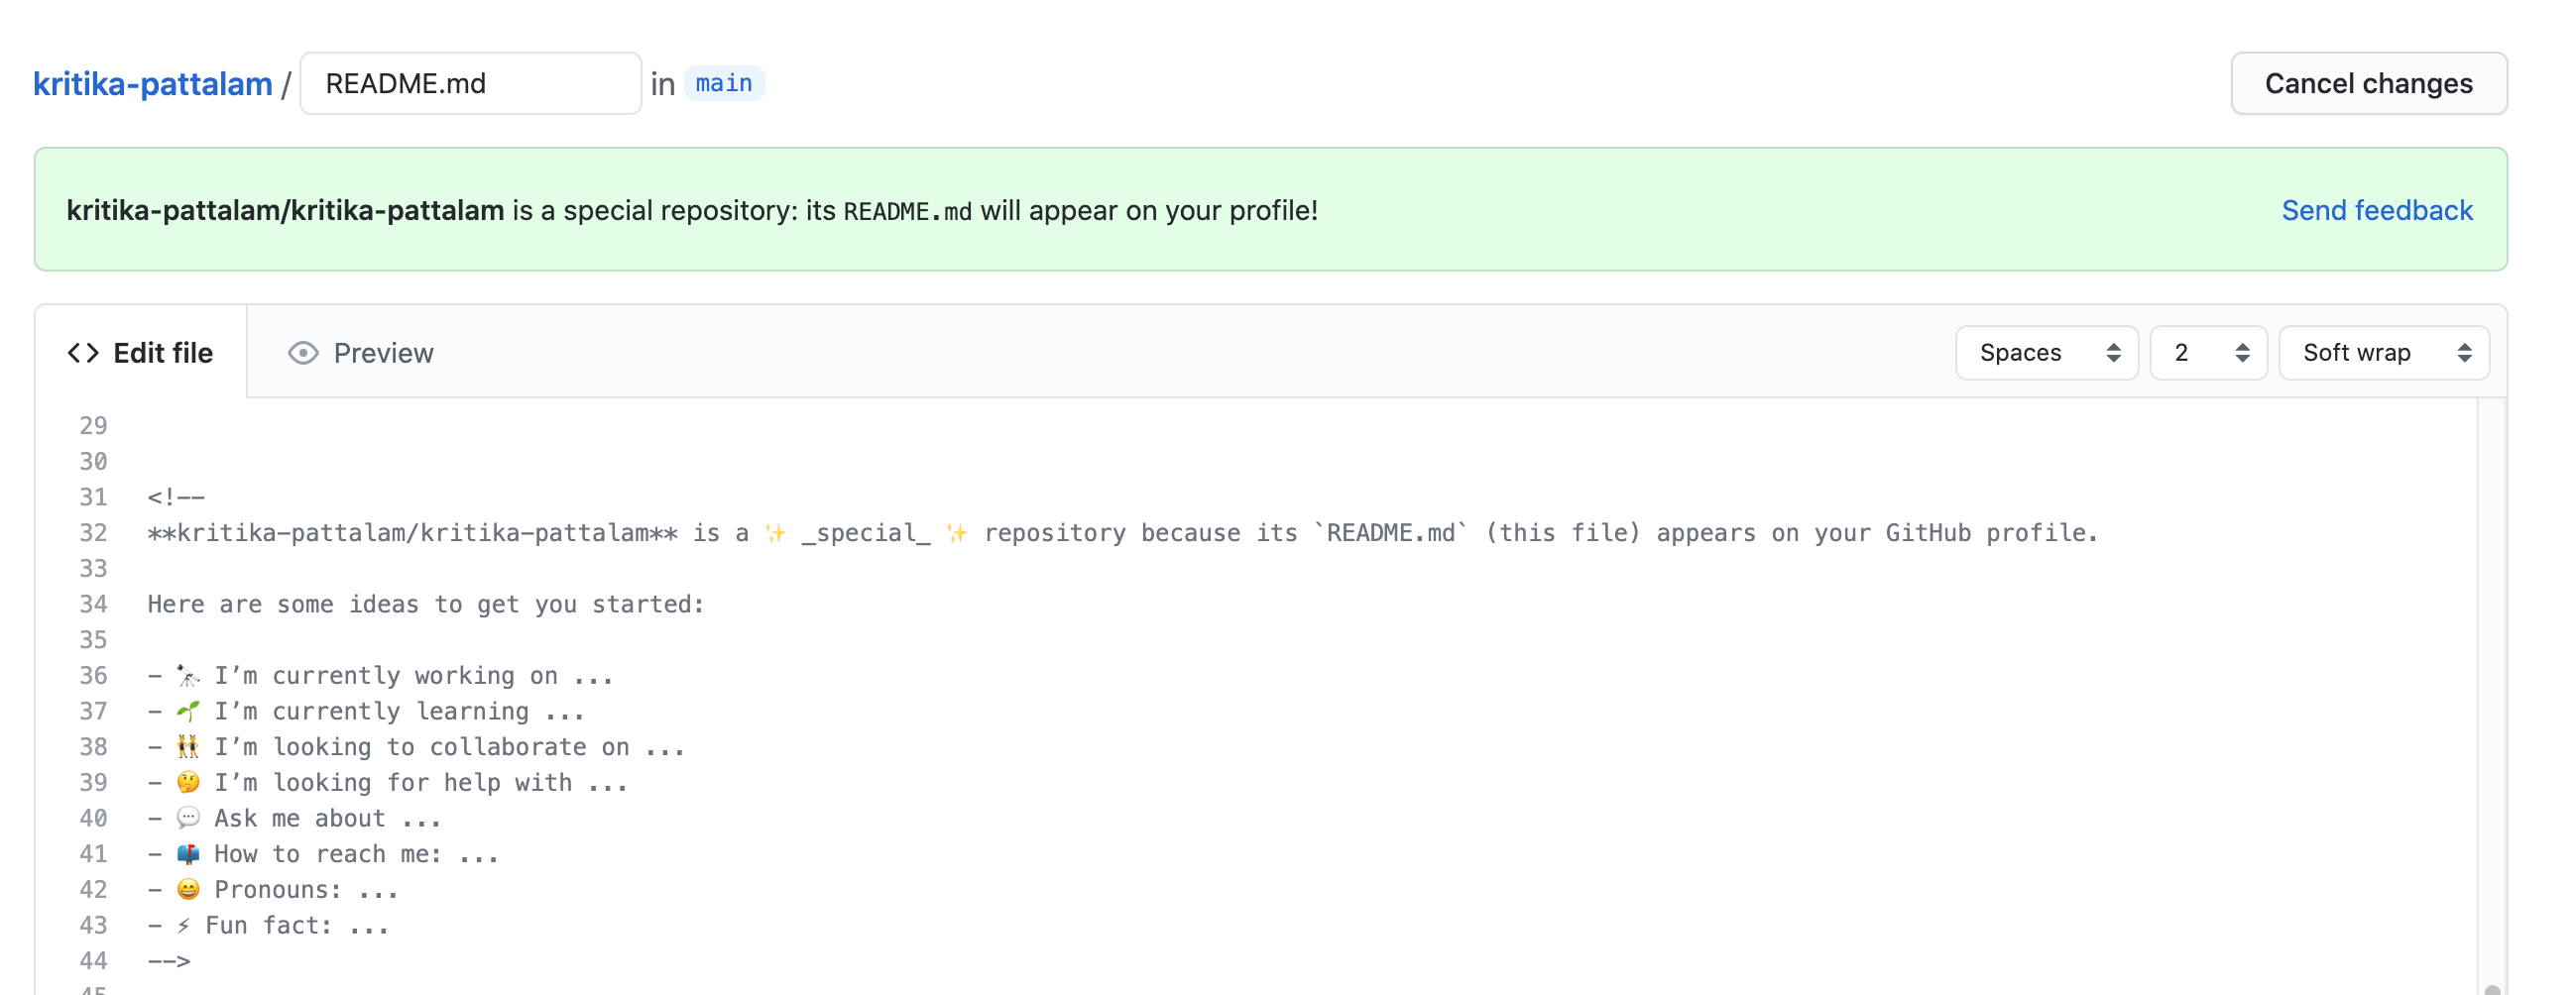
Your github profile readme file has been created with a dummy content for you to get started.
Adding Markdown to the Readme.md file
Markdown is a lightweight markup language that you can use to add formatting elements to plaintext text documents. It can be used to add anything to a readme file. Even though its a markup language it does not accept css classes, hence the plain old HTML attributes such as width for an image , align="center" for a paragraph tag can be used to align the layout. Read more about markdown Markdown cheatsheet
Widgets
You can add the below code to your markdown file , replacing {username} with your github profile username. There are more options such as choosing your own themes, whether you want to show the icons or not. To know more about the options, you can refer Github Widgets
#### Github Stats
<img src="https://github-readme-stats.vercel.app/api?username={username}&show_icons=true&theme=gotham" alt="github stats" width="45%" align="right"/>
### Github Streaks
<img src="https://github-readme-streak-stats.herokuapp.com/?user=kritika-pattalam&theme=dark" width="48%" >
### Top Languages

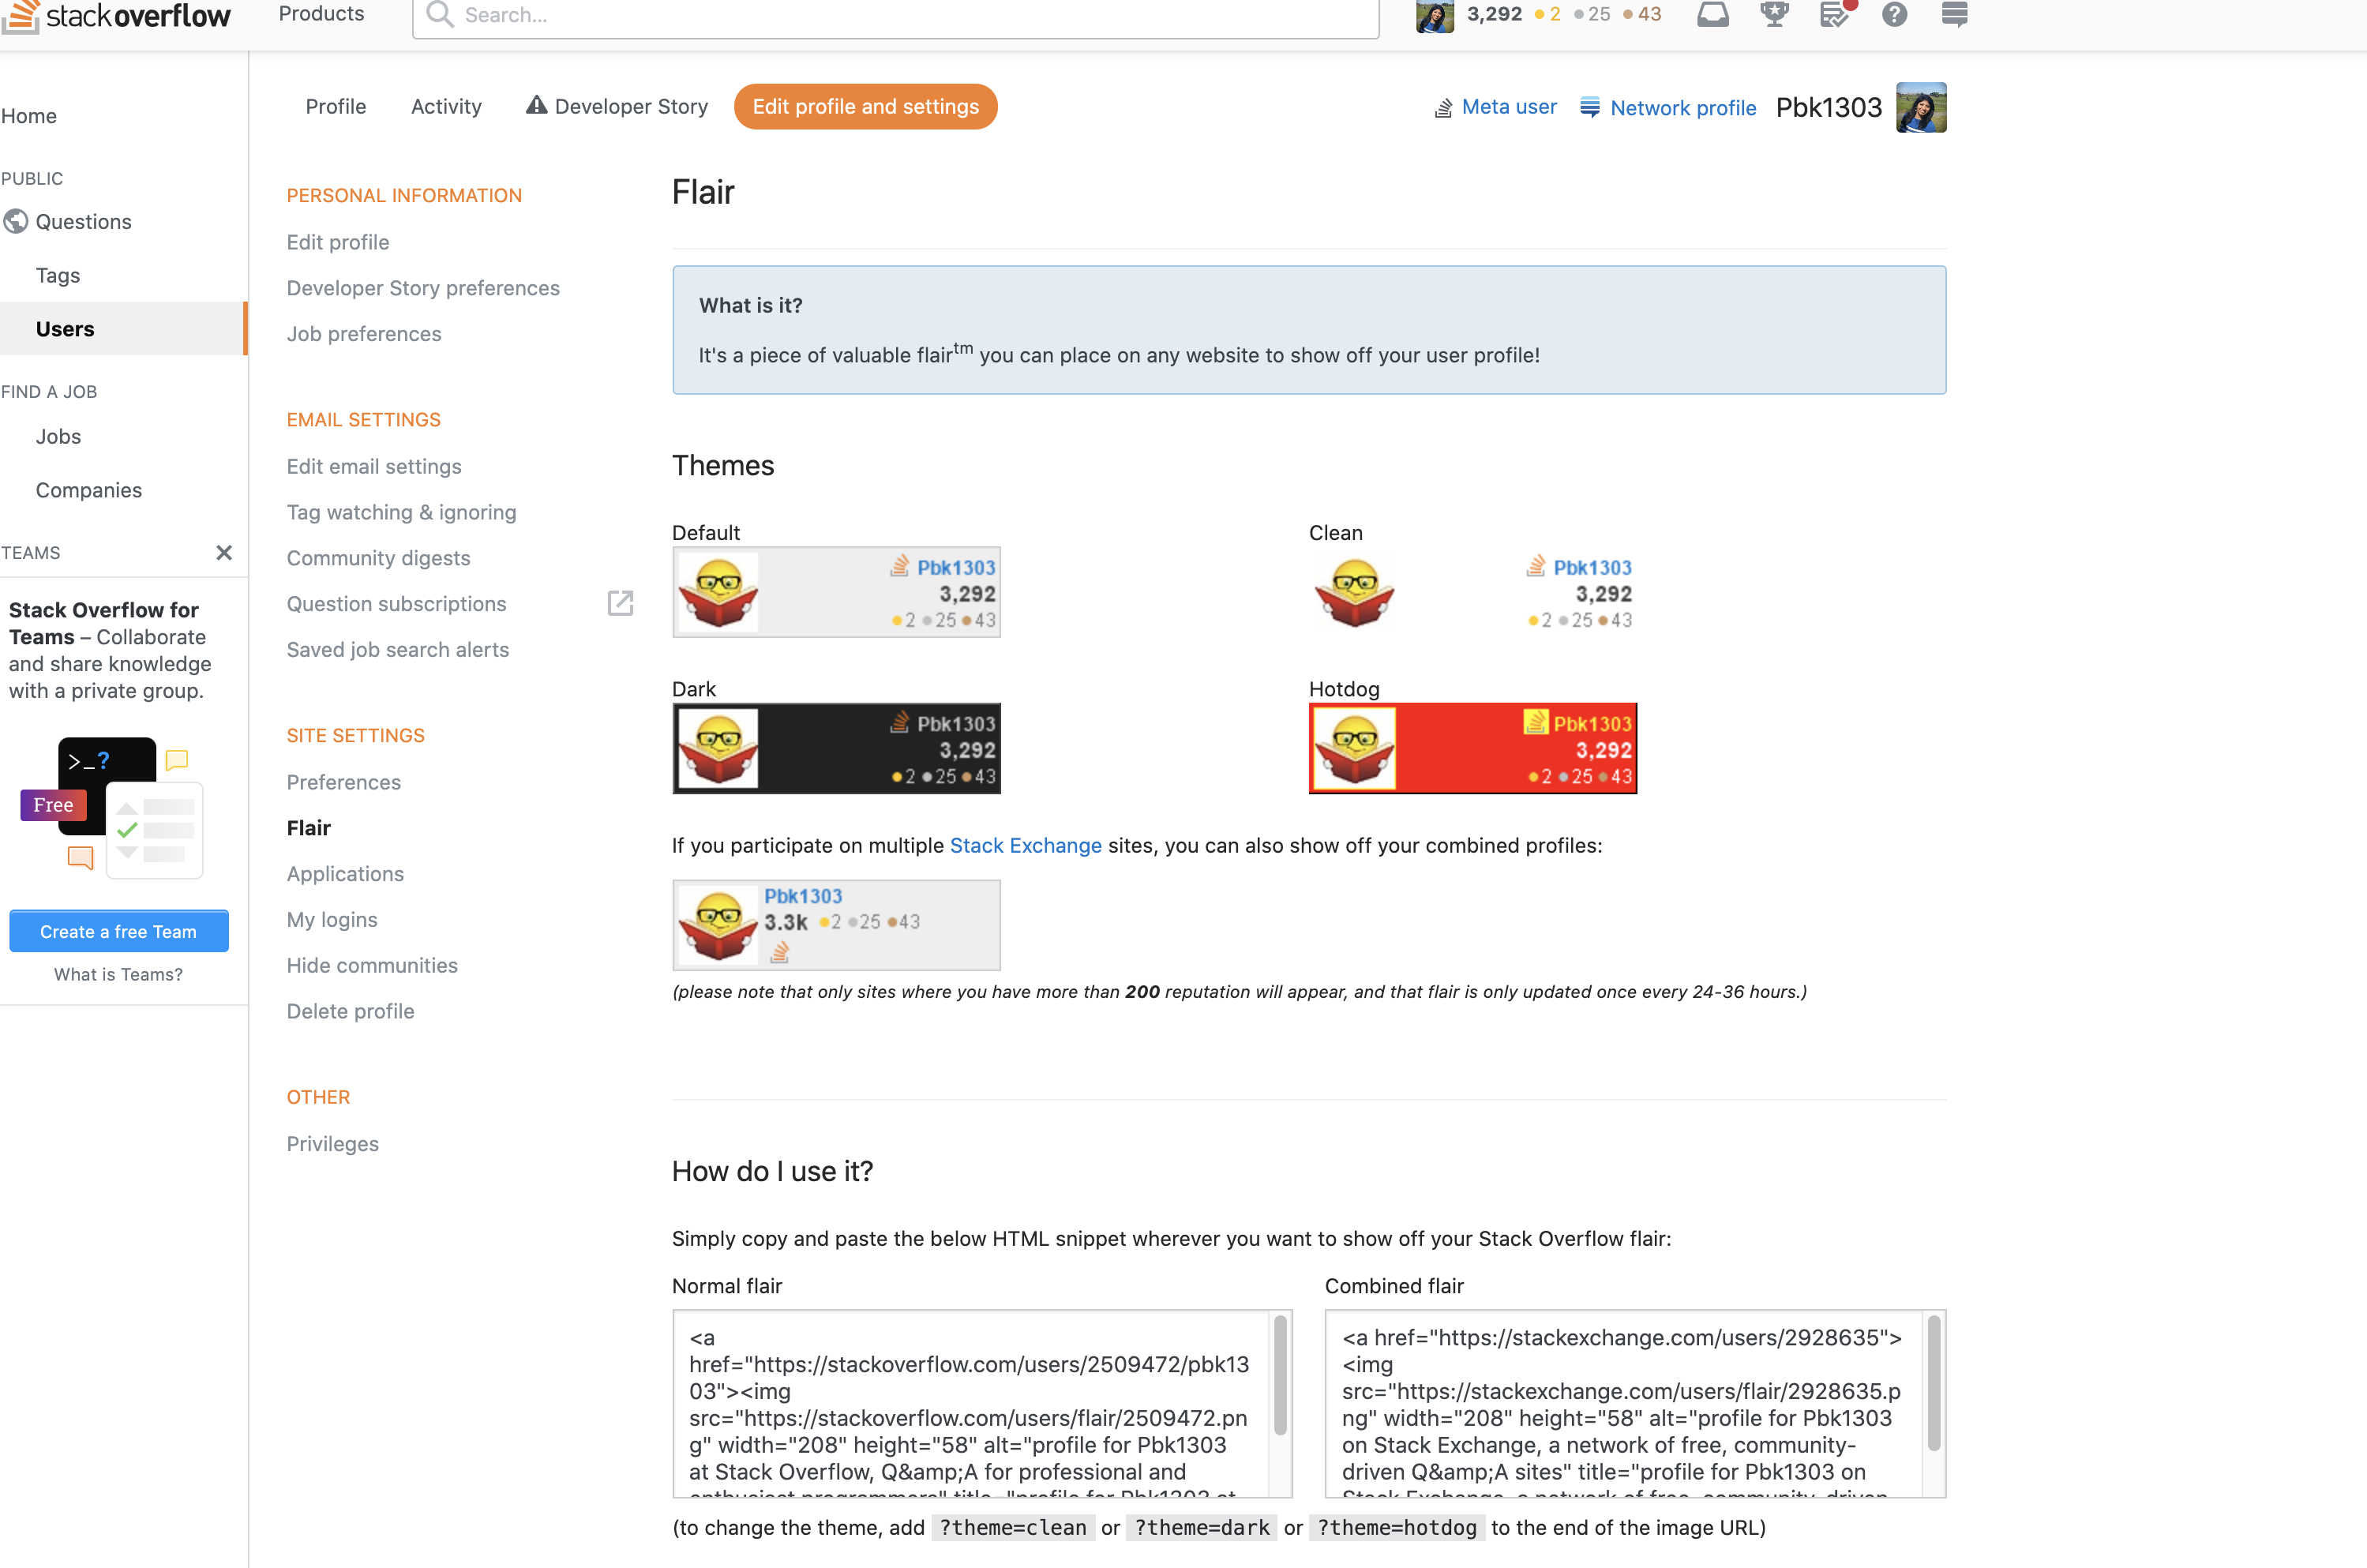
Stackoverflow reputation using Flair
If you have a stackoverflow account, adding this to your github profile to reflect your SO reputation is straightforward.
Step 1: Go to your stackoverflow account, and click on edit profile and settings. Step 2: Scroll down to Flair found under site settings. Step 3: Copy paste the code snippet to your readme file
Finally once you are done with all the changes, commit the readme.md file and you should be able to see your Readme.md github profile. You can see mine at Kritika's Github Profile .
Let me know your thoughts in the comments below. Feedback and suggestions are Welcome.!!!!
References:
- Markdown - Beginners guide to Markdown by @jatinrao
- Markdown cheatsheet
- Create your badges eg: my Techstack was created using the shields.io
- Github Widgets
Lets connect on Twitter | LinkedIn for more web development related chats.